Monday, September 04, 2006
Fuselage interior coming together.
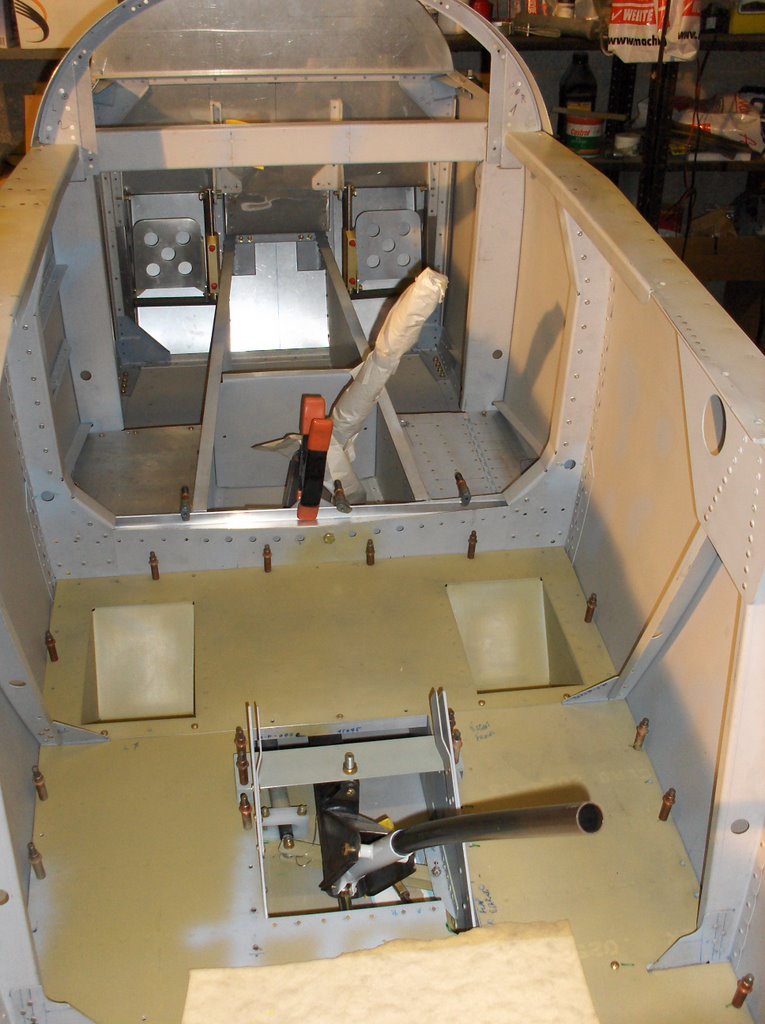 This picture gives a good general idea as to how far the interior of the fuselage has progressed.
The floors are all in place, and the cut out for the flap drive is complete. In the build manual it said to install the inner flap drive brackets with nuts since they were accessible. To my mind only accessible if you have the dexterity of an orang utang, so I have used a pair of nutplates at ALL four bearing locations. The mount for the rear control column bracket is 'floating' for now and awaiting a trial fit of the wings. It will be quite easy to secure that with nuts however when I can match drill the holes.
The left side floor is drilled #30, and I will install with LP-4 pull rivets. (They are lighter than nutplates.) The right hand side I have made removable, and installed #8 nutplates to secure it. These were difficult to install since you are working very close to the side skin which makes for great difficulty operating my Tatco. I have since learned that it is recommended these are installed prior to skinning the aircraft. I endorse this. A shame VANS don't mention it. I used some CCR-264SS-3-2 blind rivets in the most difficult places.
The reason I want the floor removable is I plan to have a wing leveler down there on the RH side, and will need accessibility.
Yes, if you are wondering, I have used 4 different etch primers. Mostly it is a biscuit colour, but there are also 3 different shades/brands of gray. From here on I will be down to 2 colours: biscuit ,and small jobs with a rattle can of gray.
 Looking aft I have found a way to fix the upper rear baggage bulkhead. I am not sure what others have done. I made up some little brackets that stand the panel forward 1/2" and secured with #8 nutplates.
The rest of the baggage compartment is complete, though not installed in this picture.
I re did the throttle mounting by installing two very simple brackets. I think it positions the throttle in the right area, provides the necessary strength and is the lightest implementation I can think of.
I seem to have a different view of weight from most. Perhaps I will sound off in RAMBLINGS.

I worried about how close to have it to the sidewall. It is hanging on 3/4"*3/4* angle and I think this will suit both my knuckles and thighs. We shall find out one day!
On my last posting here I said I would put a final picture of the forward baggage draw on the blog. I never did. I have put everything together so it will be easy to install the draw if I ever decide I want it, but with the main baggage area plus the empty hole called the battery compartment, I think I will have enough storage and capability to adjust the CofG.
![]()